Interim Update

I’m back, ready to post more frequently on a range of my current gaming interests. Coming up soon:

  • Making cheap armies using the increasingly numerous plastic boxed sets. I’ll be illustrating this with 200 point armies for L’Art de la Guerre, but the principles apply to any system.
  • Pictures of my own To the Strongest medieval armies as I get them ready for the World Championships. As the first winner, will be be fourth time re-lucky? Also news as I sculpt my own figures using green stuff to fill in some spaces.
  • Links to games on https://www.vislardica.com/
  • Scratchbuilding 15mm terrain, with progress and links to useful sites.
  • Any campaigns I run will get posted here.
  • My reading on the late 17th century, including the Scanian Wars and Vienna 1683.

Here’s a picture of the late Medieval Germans taking the fight to the Mongols in To the Strongest.

med v mon3 dec16

Ye battaille of Edge Hille

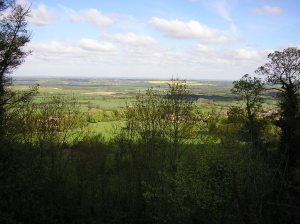
Five years ago we visited Edgehill on the way to Bosworth – photo of the battlefield from the garden of a nearby pub.

OLYMPUS DIGITAL CAMERA

On Tuesday night we refought  the battle of Edgehill using To the Strongest Rules. If you haven’t come across these before, they are a measurement lite, slick set of Ancients rules that also work very well for the Renaissance with the addition of some new troop types.

This battle was smaller than our previous effort of Marston Moor, and was completed in 2 and a half hours from getting the boxes of troops out until decisive victory. It could have been finished 45 minutes earlier, but the Royalists managed to hang on… that’s right, Parliament ended the war at the first attempt.

IMG_0011

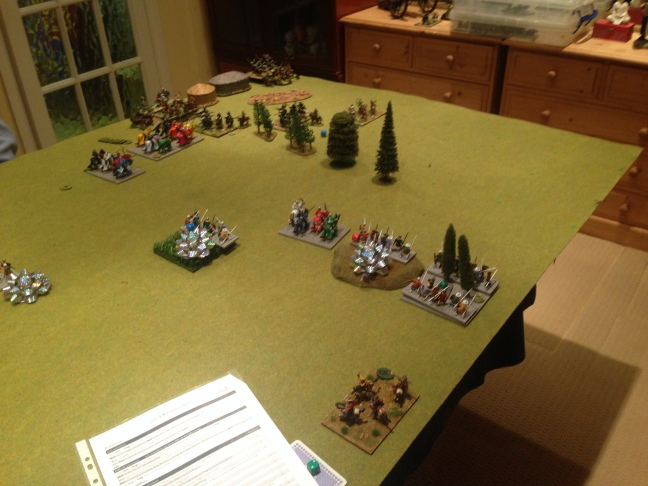
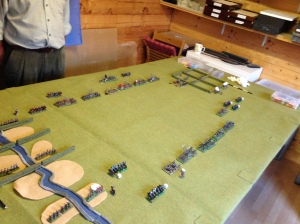
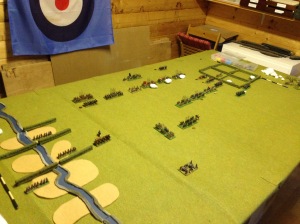
The Royalists deployed first and took the first move. They started with 14 victory medals to lose, as against 16 for Parliament. Both sides deployed with lrge brigades of foot in the centre, Cavalry on the flanks and commanded shot and dragoons in the rough ground at the edges. The Royalists start with a cautious advance on both flanks, and some ineffective firing from the artillery.

IMG_0012

The musket fire from the Parliamentarian shot can be seen in the far distance. To speed up the game, this time I ruled that at the end of a turn all units would automatically reload – so to fire more than once in a turn you stil have to fire – reload – fire which limits the possible machine gun effect of multiple actions. Plus the smoke looks good. Parliament’s forces seized the hedges in the rough ground, and their horse advanced a little too.

IMG_0013

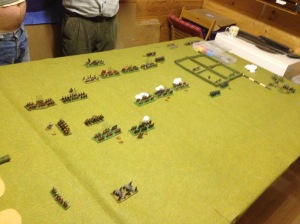
The Royalists reply in kind, smoke billowing across the battlefield. rupert moves forward to personally supervise the skirmishing on the right.

IMG_0015

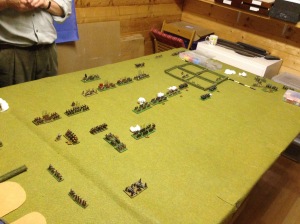
Disaster strikes for the Royalists! The well hedged Parliementary shot despatch the advancing Royalist dragoons and Prince Rupert of the Rhine goes down with a musket ball in the brain! The Royalist right is now without a commander and much harder to co-ordinate. The Parliamentary horse have moved up to support the shot in the rough ground and contain the Royalist Cavaliers.

IMG_0016

Royalist Horse on both flanks charge to contact in an effort to get their main attack going. They are superior to the troops they are facing, but short on pistols (only 1 shot per unit rather than 2). On the left they disorder the Parliament Horse as they charge in, but fail to despatch them, and are disordered in combat themselves.

IMG_0017

The Parliamentary shot continue their excllent battle by routing some more Royalist dragoons on the left, and supporting their cavalry with fire to rout the Royalist attack. The Royalists are now risking demoralisation on both flanks and have yet to make any impact on the forces facing them.

IMG_0018

The Royalist commander goes for the only option left, and the foot advance to firing range. The second cavaliers unit engages the enemy of the left.

IMG_0019

The Parliamentary shot have advanced on the right, and open fire on the leaderless Royalist cavaliers from the safety of the hedged fields.

IMG_0020

Firing continues across the field as the Royalists form a solid line. The commander had trouble keeping all of his troops within earshot while riding about to motivate them.

IMG_0021

As the cavalry fights continue, the Parliamentary dragoons clear out the final Royalist troops in the rough ground. 4-0 to Parliament and command of both flanks, somewhat surprisingly.

IMG_0022

The Royalist foot advance to support their horse on thr right. The artillery fire has slowed now as more gunpowder is brought forwards, although both sides have been completely ineffective anyway.

IMG_0023

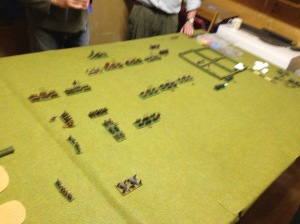
Smoke all along the line as Parliament opens fire. The Royalist horse on the left have routed, bowing to inevitability. The Royalists have lost 12 out of 14 points, leaving them on the verge of breaking. The Parliamentary commanders relax, assured of victory. They have cleared the Royalist left flank and can now roll up the centre at leisure.

IMG_0024

The Royalist commander gets more of the foot into action, and wheels the left of the line to protect the flank.

IMG_0025

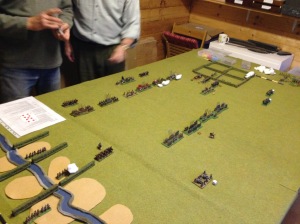
Parliament replies in kind. Although the musketry is effective, the sheer size of 2,000 man brigades means it will take a while to grind them down. The commanders ride along, rallying and encouraging their troops.

IMG_0026

The cavalry take 2 hits, the light infantry and artilley 1, and most of the infantry take 4 hits – so the infantry battle will be a slow affair.

IMG_0027

Firing on the right, advancing on the left to crush the hing of the position.

IMG_0028

Royalist cavalry in desperation charging into the rought ground on the righ to get at the musketeers firing at them. Charging even in the flank across hedges is fairly ineffective.

IMG_0029

Surely it is all over now…

IMG_0030

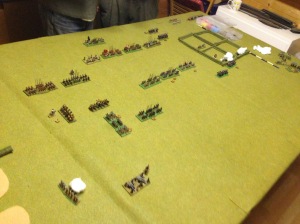
The Cavaliers finally kill a unit of Parliamentary horse on the right… supporting fire has kept them disordered and while their quality makes them difficult to kill, that means their attacks are ineffective. The main Royalist weapon has been nullified.

IMG_0031

Thourough outflanking – but only by small units of musketeers.

IMG_0032

The royalists on the right kill the other unit of horse, and face the dilemma of cavaliers – lacking a commander they have a 50% chance of rallying the horse from pursuit – but if they fail that is the commanders go. Or they can leave the horse to pursue into whatever is in front of them, and then potentially on to Kineton…

IMG_0033

The Royalist position is holding…

IMG_0034

and holding….

IMG_0035

And firing…

IMG_0036

and holding…

IMG_0037

…and after firing again, the second flank collapses to the fire from the musketeers.

It was a fun game, the focus was on the tactical situation, not looking up rules. The rules themselves work well for the period, but unit sizes are very important and big units can really bog the game down – we’ll see how that works with more play. I’ve been asked to think up army lists for Turks, so we may well be fighting different styles of warfare in some of our next games.

Keep up with To the Strongest here: http://bigredbat.blogspot.co.uk/search/label/TotheStrongest!

I took the army lists from here http://www.gmtgames.com/tacw/TACWPlaybook.pdf and the terrain from my copy of Edgehill Revisited. There’s another version of Edgehill that is in another of the GMT booklets, so we may do that another time.

Strongest on the Moor

Last night at the club we tried an adaptation of To the Strongest to refight the battle of Marston Moor. The aim was to see whether the flavour of the period could be captured with minimal changes to the rules, while retaining the big battle fast play characteristics of the original game.

I took the army lists from here http://www.gmtgames.com/tacw/TACWPlaybook.pdf and the terrain from my copy of Cassell’s battlefields of Britain and Ireland. The basic rules were adapted with extra rules for Cavalry pursuit, battalion guns, muskets, cavalry pistols. I gave each line of every wing a commander, with a wing commander and overall army commander. This made 9 commands for Parliament, and 8 for the Royalists. Army size was about 60 VPs each, 36 units a side of varying sizes. There were 2 players a side and we stopped after 3 1/2 hours with Parliament clearly on the way to winning, having taken 15 of the 20 VPs needed and lost 5.

MM1

The battle started with the Royalists remaining stationary and commencing bombardment with their cannons. Parliament replied in kind in the centre, destroying one of the Royalists batteries. One the left wing, a little known commander named Ollie Cromwell suffered a command failure, and the advance was delayed. This picture is taken after the parliamentarian second turn; having considered the risk of Royalist reinforcements and the ineffectiveness of their artillery, they advanced in the centre. The right wing cavalry were also unprepared to start the battle…

MM2A couple of turns later and the Parliamentarian advance is general. The royalist right is advancing to meet them, the left staying securely behind the hedge and ditch. The red dice mark pistols remaining, all cavalry units started with 2 and could reload if they wished though in practice charging and rallying turned out to be a higher priority. The parliamentarians are struggling to manouvre through their own guns and restricted by the limit of 2 units in a square.

MM3As the Parliamentarians advance, the Royalists respond with opening volleys from the Pike & Shot units and charges on the right flank. The yellow disorder markers show the effects on the Parliament forces, and the puffs of smoke identify units which have fired and need to reload before they can fire again. The first of the Royalist stragglers from York have started arriving to form a third line in their centre.

MM6The Parliamentarians have also start firing and realoding, and the centre looks to have bogged down. On the right, the Parliament forces have piled forward and are charging over the hedge! Lord Goring goes down in a hail of pistol shots and the unit is disordered by the action. His 2 Line commander will take over the wing in the following turn – but now command a large number of units spread across the countryside.

MM7

In the near left, the commanded shot can be seen opening fire at each other on the extreme flanks of both armies. The Royalists are accompanied by a battalion gun, which allows a miss to be replayed each turn. The royalists have taken casualties in the centre – the final artillery unit and a small Pike and Shot unit are gone. On the Royalist right a unit of horse has been beaten by the veteran Ironsides facing them and has routed. The Ironsides pursue, Cromwell happy to have them attack the second line in front of them. Across the battlefield the second and third line commanders impatiently try to find a way of getting their troops engaged in the fight.

MM8

The Parliamentarian infantry advances in the centre, as more gaps appear in the Royalist line. They are holding back in front of the hedge, content to exchange musketry.  In the forefront, one unit on each side is disordered and vulnerable, and on the extreme flanks on both sides the commanded shot exchange fire with limited effect.

MM9

The fight on the flanks gets bloody as one cavalry unit from either side routs. The Royalist commander also goes down in the combat, his victorious cavaliers start their pursuit, for which recovery will be very difficult. The second line of Royalist latecomers have arrived, and the reserves are edging left alog the edge of the table, to cover and expected collapse of their left wing. Rupert is superceding command in the front line of the cetre, getting the infantry to fire and reload more quickly.

MM10

the pursuing Ironsides have become stuck in front of a Pike and Shot unit left there to pin any advacing horse. They charge into it unthinkingly, are virtually unable to damage it but the fight back does little either. Without pistols they are taking a high risk continuing to attach a unit with pikes. Slightly to their right, some Verloren Haufen evade from an advancing Pike & Shot unit. The royalist line is bending and will soon break just past the end of the hedge. Second rank pike and shot units have been stepping forward to fill gaps in the front line.

MM11

The final position. 15-5 to Parliament, who have almost broken through between the centre and their left flank. On the right the hedge has limited their effectiveness and they haven’t got over it in spite of larger numbers.

It was a great battle, a massive undertaking for a club night and the rules got us almost through it. I mostly like the way it worked, I’ll make some alterations and look out for the next report!

For more on To The Strongest, the author’s blog is here http://bigredbat.blogspot.co.uk/search/label/TotheStrongest!


First Shot

This blog will chart developments as I build some 15mm Thirty Years War armies and develop scenarios to use with Field of Glory Renaissance to refight the battles and campaigns of the TYW. It may well include some other battles we fight at the club from time to time, and diverge a little from the initial theme. I will hopefully include lots of photos to illustrate as well. Here’s one of our first battles with FOG-R as we learnt the rules. IMAG0784